It’s been decades now that flooring designs have been trying to replicate the look and feel of wood with other materials, but it’s all in vain.
Nothing will ever truly come close to the resilience and comfortable feeling that hardwood floors give off, and they’re definitely worth the investment even if they cost a few extra bucks.
With the floor itself already being relatively expensive it’s only normal for you to seek ways to save some money, and the most obvious path to that is performing the installation by yourself instead of paying a specialist for it.
While the project is simple enough in its nature, it will demand a lot of effort on your part and take up a fair bit of your time, depending on the size of the area. Anyhow, if you’re wondering how to install hardwood floors on your own here’s a guide that should help.
Prepare Your Materials

As with any project, before starting you’ll want to equip yourself properly. You’ll actually need quite a few tools for this one, including a pneumatic flooring nailer, drill with drill bits, nails, a hammer, a circular saw (a miter or table saw will do equally well), a pry bar, tape measure, wood glue, safety glasses, work gloves, kneepads, a safety mask and a utility knife.
As far as materials are concerned, you’ll need the floor molding with the transitions and the hardwood floor itself, coming in the form of planks.
Discover why keeping your hardwood floors clean is important.
Getting Started with the Project

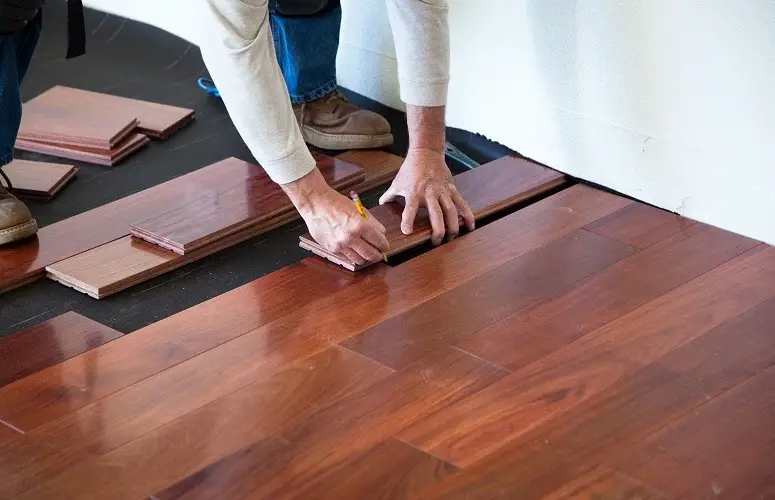
After measuring your room and working out the amount you’ll need of each material, begin by arranging the straightest planks in the first row with the tongue side pointed towards the center of the room.
The spacers are to be placed inside the expansion gap to allow the wood to expand and contract depending on the humidity levels. After that, drill some nail holes 1/2 an inch from the wall and a 1/4 of an inch starting from the narrow side of the plank, at 6-inch intervals.
After that, you’ll have to nail the first few boards to the wall by hand since the pneumatic nailer is too difficult to use in such a tight space.
Use a nail punch to countersink the nails and then fill the space with putty. Then, at a forty-five-degree angle, drive a nail through the tongue and make sure to countersink it so it doesn’t interfere with the placement of other boards.
To install the second row, simply lock the tongue of one board to the next and tap them with a mallet to make the tightest fit possible.
You should also read our buyer’s guide for the best vacuum cleaners for hardwood floors.
For the next step you’ll have to blind nail the second row through the tongue, and now you can bust out the pneumatic nailer for the job.
When you reach the final rows of planks you’ll have to switch back to the manual technique once again, and on the last row, you’ll have to make some cuts and adjustments to have the pieces fit. If the last piece is an inch wide or less you can apply some wood glue to its tongue and force it in with the pry bar.
Conclusion

Finally, you’ll have to install the transition pieces and get rid of the spacers and for that, you’ll need to consult the instructions that came from the manufacturer.
Once that’s taken care of, you’ll have to place the finishing touches but cutting the underlayment and reattaching the shoe moldings and baseboards back to the wall.
Here you can learn how to sand wooden flooring.
Resources
Declutter your home once and for all (Even if you have no time and don't know where to begin)! Learn More.

