Using a pegboard is one way to organize your space. With it, you can hang all sorts of hooks, boxes, and even shelves for different items. But all those things can be heavy and put pressure on the pegboard, so can a drywall support a pegboard?
You can mount a pegboard on drywall. You can hang your board and all the items you want on it without issues as long as it is secured with the proper hardware.
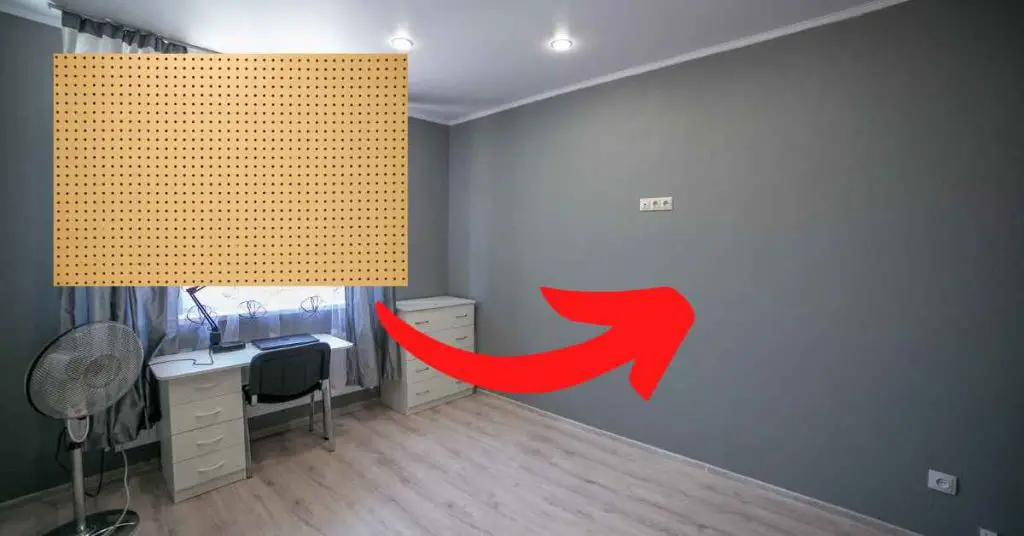
This article will explain how to properly hang a pegboard on drywall and where you can hang it in your home.
Is It Okay To Hang a Pegboard on Drywall?
It is okay to hang a pegboard on drywall. However, you will have to use the proper method and hardware to ensure your board is securely attached to the wall. When attaching a pegboard, it needs to support the weight of the board and the items you will hang.
So, to give your pegboard ample support, you should make sure the screws attaching the board to the wall go through the wall studs. If screws go through the drywall without a wall stud behind them, use hollow wall anchors (source).
Another thing to note when hanging a pegboard is that there should be a space between the back of the board and the wall it’s on. The gap should be around ½ inch (1.27 cm) wide. This is so any hooks or pegboard accessories you hang will have space to fasten through the back (source).
Getting Started
Before anything else, gather all the materials and tools you’ll be using. You don’t want to be in the middle of hanging your pegboard, only to suddenly realize you’re missing a tool or a part.
Things you’ll need:
- Pegboard
- Stud finder
- Tape measure
- Level
- Pencil
- Circular saw or jigsaw
- Hammer
- Drill driver with screwdriver bit
- Drill bit
- 1 ¼” to 2 ½” (31.75 mm to 63.5 mm) wood screws
- 2″ (50.8 mm) washer head screws
- Drywall/Hollow wall anchors
Once you have everything ready, follow the steps below.
- With the help of the stud finder, find the location of the studs behind the wall that you plan to cover with your pegboard. Use a pencil to mark these locations.
- Use your pencil to trace the outline of where you want the pegboard to be. Use the level to ensure you draw straight lines and that your pegboard’s position is level.
The next steps depend on whether you’ll hang your pegboard with furring strips or spacers.
Hanging a Pegboard With Furring Strips
Your furring strips will give your pegboard extra support, as well as make the required space between the board and the wall. For this method, you’ll need 1″ x 2″ (19 x 38 mm) lumber (source).
- Using a circular saw or jigsaw, cut pieces of 1″ x 2″ (19 x 38 mm) lumber to fit the width (i.e., the top and bottom side) of your pegboard outline.
- Cut pieces of 1″ x 2″ (19 x 38 mm) lumber to fit the length of each stud covered by the outline.
- Fasten the horizontal top and bottom pieces with wood screws first. Then, fasten the vertical pieces. Screws should be spaced around 12″ – 16″ (30 cm – 40 cm) apart. Screws should be driven through the lumber, the wall, and into each wall stud. If screws don’t hit the wall studs, wall anchors should be used.
- Place your pegboard on the wall, aligned with the outline you marked.
- Secure your pegboard to the furring strips using wood screws, spacing them 12″ -16″ (30 cm – 40cm) apart. Depending on your preference, you can drive your screws through pegboard holes or through the board.
Hanging a Pegboard With Spacers
Under this method, instead of using furring strips to create the gap between the board and the wall, you’ll use spacers. You can buy these from the hardware store or make your own with scrap lumber or washers (source).
- Have someone hold up the pegboard against the outline on the wall.
- Using a pencil, mark through the pegboard holes where a screw will go. The screws should be spaced 12″ -16″ (30 cm – 40 cm) apart around the edges of your pegboard.
- Make a small mark beside the hole on the pegboard where you plan to drive a screw through. This will help you keep track of it. If your pegboard is more than 24″ (60 cm) wide, mark a center column of holes for screws to add more support for your pegboard.
- Starting with the holes located in the upper horizontal edge, place a screw through the front of the marked pegboard holes. Place your spacer through the back of the screws.
- Hold up the pegboard and use your drill driver to drive the screws through the wall and initially hang the board. Start from the outer edges going toward the center. If the screw isn’t going into a wall stud, drill a hole into the wall where it goes.
- Install a drywall anchor by tapping it into the hole with a hammer until it’s flush with the wall.
- Once the top side is secure, you can drive the other screws through the wall or into their anchors. Start with the screws at the outer edges of the board toward the center.
This Hotop Store Pegboard Mounting Kit (link to Amazon) comes with all the hardware you’ll need for hanging your pegboard- screws, spacers, and washers for a ½ inch (1.27cm) thick pegboard. This removes the hassle of having to buy each piece of hardware separately.
Pegboard Organizing Tips
A pegboard has various hardware you can use to help organize different areas in your home. What’s great about a pegboard is that you can install, adjust, and remove hardware based on your needs. Pegboard hardware includes:
- Hooks
- Boxes
- Shelves
G.CORE Pegboard Hook Assortment (link to Amazon) gives you various organizing options — hooks, shelves, cups, and bins. Its 18-piece assortment is a good number to start with when testing out which pegboard accessories work for your needs.
Here are some areas you can use a pegboard and what you can hang on it:
- Garage: Hang tools, boxes for screws, and small items
- Kitchen: Hang pans, kitchen knives, shelves for spices, and small bottles
- Pantry: Adjustable shelves for different bottles and cans, etc.
- Bedroom: Hang boxes for pens, hooks for clothes and accessories, etc.
Final Thoughts
A pegboard can be hung on drywall using the proper hardware and methods. The key is hanging it securely to hold the board’s weight and items to be placed on it.
Declutter your home once and for all (Even if you have no time and don't know where to begin)! Learn More.
