Whether you’re an experienced DIY-er or you’re prepping for your first painting project, knowing when and how to clean your walls before painting is important to know.
Cleaning your walls before painting them will ensure that the paint sticks to the walls easily and smoothly. While there isn’t one singular way to clean your walls, most paint manufacturers agree that you should use a mild soap or detergent with water to clean your walls before painting them.
The rest of this article will discuss how to clean your walls before painting, what cleaning agents to use, and how to remove tough stains like grease and mold from your walls.
Can You Use Vinegar To Clean Walls Before Painting?
Vinegar is a common household item that’s been used as a cleaning agent for decades. So, it’s only logical to wonder if vinegar can be used to clean your walls before painting.
Vinegar can be used to clean walls before painting them. It is tough on grease yet gentle on skin, especially compared to chemical cleaning agents. Vinegar can be used on walls, kitchens, bathrooms, and more.
Vinegar is infamous for its natural cleaning ability. Plus, using it won’t hurt you, your pets, or your children if they accidentally get into it. Generally, white vinegar is the recommended type to use when cleaning. So, If you’re using vinegar to clean your walls before painting, you should use white vinegar. This is the preferred type for cleaning.
The rest of this section will describe how to use white vinegar to prepare your walls for painting.
Before you start splashing vinegar all over your walls, though, there are a few steps to take:
- Fill up a bucket halfway with water, and fill the other half with white vinegar.
- Also, use a separate bucket or container with normal, lukewarm water.
- Ensure your walls are clear of dust and debris before cleaning them. You can do this quickly with a vacuum appendage or a dry wipe down with a microfiber cloth.
- Examine the surface of your walls for cracks or holes after the cobwebs and dirt have been dusted away. You should fix these issues before you start painting.
After prepping your walls for painting by removing nails, dust, and flaking paint, and repairing holes and cracks, you’re ready to start cleaning them.
If you choose diluted white vinegar and water, you should use a clean cloth or cellulose sponge to apply the vinegar water to your walls.
Explore Wall Decor recommends not over-soaking your cloth or sponge with the vinegar solution as this can get messy (source).
Here’s how to wipe vinegar on your walls:
- Working methodically, start from the top of your walls near your ceiling and work your way down each wall, wiping in a circular motion.
- As you wipe away dirt and grime, rinse your walls with your clean bucket of water and a clean cloth.
- You will likely have to replace the clean water frequently to completely clean and rinse your walls.


Can You Use Simple Green To Clean Walls Before Painting?
If you’d instead use a cleaning product to clean your walls before painting, Simple Green comes highly recommended.
Simple Green can be used to safely remove dirt, grime, and other stains from interior walls. Regardless of the wall’s painted finish, the company’s non-toxic and biodegradable formula is safe to use to remove stains before and after painting walls.
Whether you’re doing a routine wall cleaning or preparing the surface for new paint, you may be concerned about discoloration from chemical products.
Simple Green boasts of its ability to prevent discoloration when used as a cleaning agent for walls (source). In addition,the product can remove tough marks like crayons or scuffs, dirt, and grime.
To use Simple Green on your walls, make sure you:
- Vacuum away cobwebs and dust that has collected, especially from the corners and baseboards.
- Finish preparing your wall for paint by removing nails and patching holes and cracks.
- Dilute 1 ounce (30 mL) of Simple Green with 4 cups (1 L) of water.
- Spray your Simple Green solution directly onto your walls, starting from the top and working your way down.
- You may have to let the solution soak for approximately 1 – 2 minutes before tough stains wipe away.
For adamant stains, Mr. Clean Magic Erasers work like a charm.
How To Clean Drywall Before Painting
After drywall installation, you have to sand it down for a smooth finish. Although the sanding step improves the wall’s appearance, it leaves behind a thin layer of fine dust on the drywall.
It’s critical to ensure that the drywall surface is clean and completely clear of dust before painting it.
Drywall dust is known to cause some health problems, so it’s also vital to protect yourself by wearing a mask while you work to remove the dust.
Before painting drywall, you must remove the dust that is produced from sanding. To do so dampen a clean cloth and use it to wipe down all the surfaces. You’ll need to rinse the cloth frequently with clean water while you work.
If the drywall is not completely dry and clear of dust, the paint will not adhere to the wall properly.
Another thing to do when preparing your drywall for paint is to close all gaps and repair any cracks. There shouldn’t be any nail holes or rough spots in your wall either. Make sure to smooth any irregular surfaces you may come across.
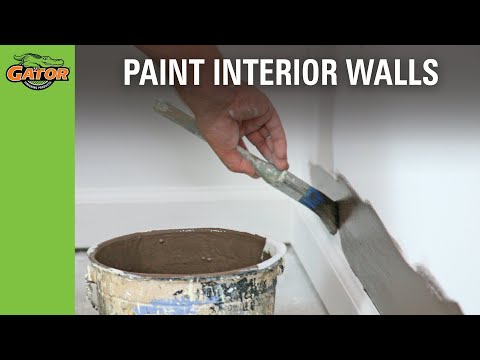
Check out this how-to video from Gator Finishing for a visual demonstration of how to prep your drywall for painting.
How To Clean Grease off Walls Before Painting
Grease is one of those staple stains in most households, especially in kitchens. So if you cook, even just a few days a week in your kitchen, you’re guaranteed to have some grease stains.
Before painting, it’s always recommended that you clean the walls thoroughly to ensure that the paint adheres to the wall and has a smooth, clean finish. If you omit the cleaning part of the painting preparations, not only will the color have a hard time sticking to the walls, but it could also leave an uneven or discolored finish.
Grease stains can be intimidating to combat, but the good news is, almost any dish soap can remove grease from your walls. But, just like Dawn advertises, it’s tough on stains.
House Logic advises people to:
- Mix ¼ teaspoon (1 mL) of dish soap, like Dawn or other tough on grease soaps, in about 1 cup (250 mL) of warm water.
- Scrub the stain until it’s gone using your soapy mixture and a clean cloth.
- Use clean water and a clean cloth to rinse the wall and clear away any remaining soap.
- Use a clean, dry cloth to dry the area.
(source)
Make sure you clear away any dust on the walls before cleaning them with your soapy mixture.
If your grease stains are stubborn and the above method isn’t working, you can try vinegar to remove them.
Remember me telling you about how great vinegar was for cleaning? Well, here it is again! White vinegar is a potent cleaning agent and generally works well at removing grease stains.
- Mix about a ⅓ cup (200 mL) of white vinegar with ⅔ cup (80 mL) of water.
- Scrub the area with a damp, clean cloth.
- Rinse the room after removing the stain with plain water.
Make sure your walls are dry after cleaning and before painting them. To dry the walls, after you have rinsed the vinegar, use a dry, clean cloth and blot the wall dry. You could also try using a hair blow dryer to speed up the process.
Of course, if you’re in no hurry, you can always let the air dry the walls so long as the water isn’t continuing to drip down the side.
How To Clean Mold Off Walls Before Painting
Mold is not only an unsightly nuisance; it’s also a health hazard that should be addressed immediately.
If you’re ready to start painting, you need to deep clean before you get your samples and drop cloths, particularly your walls.
Mold typically builds up in areas with a lot of moisture exposure. Some prime areas of your home where it’s likely to accrue on the walls are in your bathroom. Regular showers and baths can open the door for mold growth, so it’s essential to clean your living spaces – especially your bathroom routinely.
If you notice mold on your walls, particularly walls you intend to paint, you need to remove the mold buildup before starting.
There are a few options for removing mold from your walls. The best place to start is with a potent cleaning agent such as bleach.
Bleach is potent and can be overwhelming to smell and use. So, make sure you use rubber gloves and even a mask if you’re having a hard time with the fumes while using bleach to clean your walls.
Additionally, prepare the area you’ll be working in if you’re planning on using bleach by making sure there is plenty of ventilation. For example, if there’s a window, open it while you’re cleaning. Or, use a box fan in the window to ventilate the room while you work.
Some bleach-based products are designed for bathrooms if you want to be incredibly aggressive on your mold stains—for example, Clorox Bathroom Bleach Foamer. However, good old-fashioned bleach is also highly efficient.
If you’re planning on painting your walls after cleaning them, you probably don’t need to be concerned about discoloration. But, bleach does have the potential to discolor some surfaces.
Here’s how to prepare and use bleach for mold removal:
- Dilute bleach with warm water and then apply it to the area or spray bleach directly to the stain. For tough mold stains, allow the bleach solution to sit on the site for a few minutes before using a stiff brush to remove the mold.
- Use warm water and a clean cloth to rinse your walls after the mold has been scrubbed away.
Another option for removing mold from your walls is vinegar.
That’s right; vinegar is excellent for all sorts of cleaning projects and tough stains! For a more natural and less chemically potent means of removing wall mold, use a clean spray bottle and fill it with white vinegar.
Here’s how to do it:
- Spray your vinegar directly on the mold and let it sit for about 20 to 30 minutes.
- Scrub the area with a stiff brush. You may need to repeat this process to remove the stain thoroughly.
- Rinse the area with clean, warm water and a clean cloth once the mold is gone.
Another option for removing mold from walls is a baking soda paste.
To use baking soda on your mold stains:
- Mix ½ a cup (100 g) of baking soda with 4-5 teaspoons (20-25 mL) of water. Mix until it’s at a thick paste consistency.
- Spread your paste on top of the mold stain and let it sit for about 10 to 15 minutes.
- Scrub the mold away with a stiff-bristled brush.
- Rinse the area with warm water and a clean cloth.
For more information about mold removal and safety precautions to take when removing it, check out the Family Handyman website and their article on how to get rid of mold (source).
Final Thoughts
Painting your house walls can be an exciting endeavor, especially when you’re using it to freshen up the space in your home. Paint can make your living space more lively, modern, or whatever you want to make it!
But, it’s always essential for even the novice DIYer to properly clean and prep walls for interior painting projects.
Sometimes life is messy, and tough stains like grease and mold are inevitable. To combat these tough stains, I’d recommend using white vinegar. Overall, this natural cleaning agent is cost-effective, readily available, and non-toxic to use.
Declutter your home once and for all (Even if you have no time and don't know where to begin)! Learn More.
