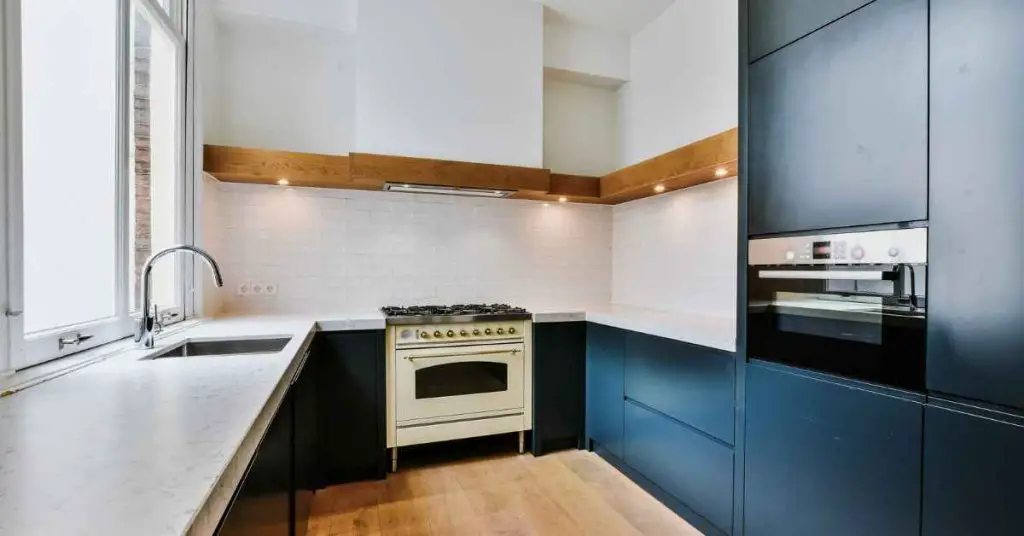
Organizing a small kitchen can be a lot of work because you have to deal with minimal space. When your kitchen doesn’t have conventional storage spaces like cabinets, the task may seem impossible. However, if you know how to go about it, you can organize your small kitchen without cabinets by maximizing other spaces!
Here are 9 steps to organize a small kitchen without cabinets:
- Estimate how much free space you have.
- Sketch out a plan.
- Maximize wall space with a kitchen pegboard.
- Install floating shelves.
- Use a mobile kitchen cart.
- Set up a rack for mugs, pots, and utensils.
- Organize drawers with dividers and stacking bins.
- Use a kitchen bookcase.
- Use food baskets and storage bins.
The rest of this article will thoroughly explain how to organize your kitchen using these steps. Keep reading!
1. Estimate How Much Free Space You Have
Before you delve into setting up your kitchen, it’s essential to get the “lay of the land” and figure out how much space you have to work with. The amount of free space in your small kitchen can depend on several factors.
These variables include:
- The space taken up by any fixed items in your kitchen.
- The aesthetic you’re hoping to achieve.
- Whether you can/will use the wall space.
- How much countertop space is available.
- Whether you can use the tops of your appliances for open storage.
With limited space and no cabinets, you have to consider every accessible portion of your kitchen as a potential open-storage space. Aside from the more common wall spaces like racks and shelves, areas like the unused portion of your sink or the top of your refrigerator can help with organization. If used right, they won’t have to ruin the aesthetics of your kitchen either!
A good idea is to section your kitchen’s parts visibly to get a rough idea of how much space is in each area. This will help you determine the best place for different items when drawing out your plan.
2. Sketch Out a Plan
After figuring out how much space is available for you to organize your kitchen, you need to draw up a plan before starting the organizing. You may be tempted to forgo a plan and just put items in different spaces on the fly, but this could be counterproductive.
The best type of kitchen organization should group items by their types and frequency of use. This ensures that after organizing all your utensils and gadgets, they’re still easily accessible when you need them. A decluttered and organized kitchen is aesthetically pleasing, but you don’t want to have to turn the entire place upside down whenever you need to find something.
A good example of a step-by-step plan for sketching out your kitchen organization is:
- Arrange your kitchen items into sections by similarity.
- List each section in order of how often you’ll need to use them. For example, you’ll need to use cutlery, spices, beverages, and cereal quite often, so they should rank high. If you don’t bake often, baking tools should rank much lower.
- Using your space estimate, list the possible storage spaces for each item type. With smaller objects, you can store more than one thing in the same area. Large items can take up a lot of space but there should also be room for foldable items like spare sheets and napkins.
3. Maximize Wall Space With a Kitchen Pegboard
A pegboard is a flat surface that fits on your wall and offers you multiple evenly-spaced holes on which to hook your kitchen tools. Most pegboards have removable hangers, but newer ones have magnetic spots too. Any pegboard you choose will offer you a wide space for attaching your kitchen tools in an aesthetically pleasing way.
A pegboard also makes utensils easily accessible. Instead of rummaging through a drawer or bin, you can hang whatever you need from the pegboard. If you have a collection of vintage kitchen tools, a pegboard is a perfect way to show them off. A pegboard’s design is beautiful, rustic, and functional without cluttering your small kitchen with extra design accessories.
Bear in mind that you can only use a pegboard to store items with an attachment for hanging or a metal portion for attaching to the magnets.
The kitchen items you can hang on a pegboard include:
- Pots
- Pans
- Chopping boards
- Large spoons
- Ladles
- General cooking utensils with handles
- Strainers
- Mugs
- Mitts
If you opt for a pegboard in your kitchen, you can easily install one yourself.
How To Install a Kitchen Pegboard
Before getting to work on installing your kitchen pegboard, you’ll need a few essential tools:
- Cordless drill
- Measuring tape
- Polycrylic gloss paint
- Paint roller
- Paint brush
- Wood screws
- Wall anchors
- Pegboard
- Over-cabinet hooks
- Wooden planks
- Paint in your chosen color
- Pencil or marker
As soon as you have all these items ready, you can start creating your kitchen pegboard by following these steps:
- Shape the board to your desired size by cutting it. Retail pegboards come in a variety of sizes. If there isn’t a size that perfectly suits your wall, you can cut it or have your hardware store shape it for you. Take note of the size of the holes drilled in the board as well.
- Cut your mounting planks into corresponding sizes. Most mounting planks have the same length as pegboards. If you need to cut the pegboard, ensure that the planks are the same size, and line up with the board when you mount it.
- Paint the pegboard. You can add a dash of color and pattern to your pegboard by painting it. Use the paint roller and brush to apply at least two coats of paint with a 3-hour interval between them, and coat it with clear polyurethane. If you’d rather stick with the board’s natural wood color, clear-coat it with polyurethane to prevent water damage.
- Leave the painted or coated board to dry for 24 hours. This allows the paint to cure and harden properly. It also ensures that the paint fumes have dissipated, and you don’t have to deal with choking paint fumes in the kitchen.
- Attach the mounting planks to the pegboard. You should use a minimum of two vertical planks on either side of the board. You could also add one in the center for added stability if the board is large or you intend to hang heavy utensils on it. Use the drill and screws to fix the board securely to the anchor planks.
- Drill four holes and insert the anchors into the wall. The pegboard will need holes in the same position as the anchors, so have someone hold up the board as you use the drill to secure it to the wall. Remove the board and insert the anchors into the holes in the wall.
- Insert the anchors into the board and seal them. Push the anchors into the board through the holes, and secure them with another set of screws. You can also paint over the screws (source).
4. Install Floating Shelves
Installing floating shelves is another way of maximizing space in your small kitchen without sacrificing any precious floor area. Floating shelves have hidden supports that give them an open and minimalist look, and offer a popular way of storing stacks of dishware.
They’re incredibly stylish, and they can add a sense of unpretentious style to your kitchen and beef up its aesthetics.
You can install floating shelves anywhere in the kitchen, and you don’t need many materials or much experience. All you need to do is screw a sturdy piece of wood to a convenient spot on the wall, and voilá! You have a new floating shelf.
Floating shelves look best when they’re properly ordered, and you might consider installing multiple wooden shelves with equal spaces between them. You could also consider arranging your dishware in a uniform pattern to contribute to the organized look of your shelves.
5. Use a Mobile Kitchen Cart
A kitchen cart is an excellent solution for your daily kitchen necessities. It takes up a bit of floor space, but you get a ton of storage room in return. An exciting feature of kitchen carts is that they’re mobile, so you can wheel them elsewhere whenever you need space.
The top of the cart offers extra countertop space, which can be especially useful for storing a device you use daily, like a coffee maker. Underneath are makeshift cabinets for storing kitchen tools, utensils, and other items you need to access easily. You can also attach smaller compartments at the side of the cart for storing cutlery.
To minimize the floor space your cart takes up, you can opt for a slim and tall cart that’ll offer you just as much storage space as a wider one. If you love DIY, you could even make a fun project out of building your kitchen cart yourself (source)!
6. Set Up a Rack for Mugs, Pots, and Utensils
A rack with hooks is an excellent solution for things that can’t fit on your pegboard. You can use it to store anything with a handle that the hook can accommodate, and unlike the pegboard, you can set it up with minimal effort. To install a kitchen rack, all you need to do is attach a rod or anchors to the wall using a drill and screws.
You can view a step-by-step guide in this video by KawachiGroup:

Kitchen racks are widely available, but another exciting feature of the rack solution is that you can improvise wildly. The alternatives you can explore for your kitchen rack include:
- Coat racks
- Curtain rods
- Towel rods
- Tension rods
If these rods don’t come with hooks, you can insert some and get storing! A rack can fit just about anywhere, but it’s most functional in a place where it’s out of the way and takes up minimal space in your small kitchen.
The most popular spots for hanging a kitchen rack are:
- Below the floating shelves
- Under the sink
- Behind or beside the rolling cart
- Above the countertop
7. Organize Drawers With Dividers and Stacking Bins
Every bit of closed storage is even more precious when you don’t have cabinets in your kitchen. You can use your drawer space to hide the more unsightly items in your kitchen or accommodate things you can’t leave out in the open.
If you’d like to make the most of your drawers, use dividers to create sections. You can organize the drawer’s contents based on their function or how often you use them. After filling up the “floor space” in the drawer, you can create extra room on top of them with mini stacking bins. The bins offer a whole new level of space, and you can use that for even more organizing!
8. Use a Kitchen Bookcase
A kitchen bookcase is similar to an open cabinet but with multiple shelf levels and spaces. You can buy or build a slim, tall one to hold stacks of dishware, cookbooks, and anything else that can’t fit on the floating shelves or in the mobile cart. If you have pretty or vintage dishware, it’s the perfect opportunity for showing them off!
9. Use Food Baskets and Storage Bins
After setting up carts, shelves, and racks to make the most of your wall space and added storage, you can also maximize countertop space. If you don’t have cabinets, a food basket can keep your food items organized and within reach. If you choose a stylish one, it can also function as a kitchen décor!
Storage bins can fit underneath the sinks or on top of your refrigerator and microwave. You can use them to store lightweight things that you don’t need very often.
Conclusion
Voilá! Now you know how to keep your small kitchen super-organized, even without cabinets! If you still have some leftover stuff that can’t seem to fit anywhere, here are some tips for taking care of those:
- Clear out all the items you don’t really need.
- Convert an adjoining room to store your extra stuff.
- Use a storage service to keep the extra items you won’t need often.
Declutter your home once and for all (Even if you have no time and don't know where to begin)! Learn More.
