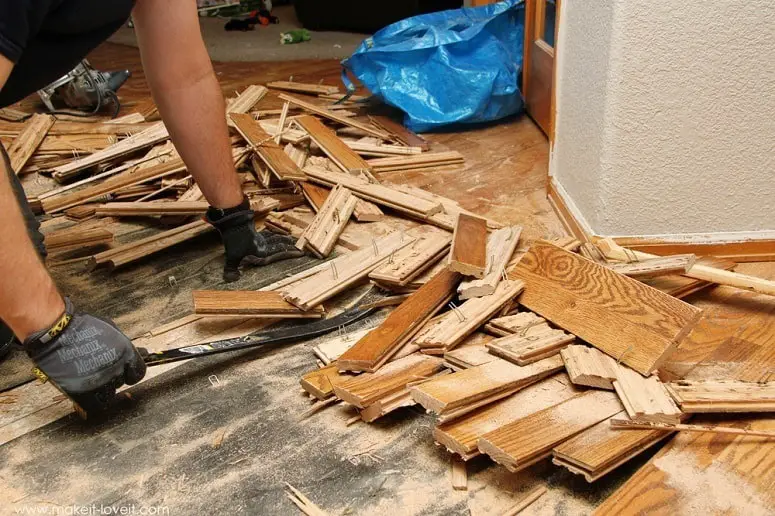
While some people love DIY, my partner and I are about as far from having our own DIY TV show as you can get! Well, we wanted to do a little decorating in the hallway. We had been putting this off for a couple of years as we have an old hardwood floor that we have pretty much neglected and it is in really rough shape….. it needed to go!
We thought it would be a really difficult job, but actually with a few simple tools, being able to remove hardwood floor is actually really easy. I want to share with you the steps that we took and the equipment we used all without any of the foul language that happened when our DIY session was taking place!
Please note that while it is ok to remove hardwood floor, you may want to avoid actually installing your new one, unless you know what you are doing. However, removing a hardwood floor is going to save you a lot of money, money that can go towards getting a new one professionally installed.
What Equipment Do I Need To Remove A Hardwood Floor?
Let’s start by making sure you have the right tools for the job, I borrowed most of this from my father in law, but you can, of course, buy your own or even look into renting if you need to.

First up I have some items for you that are going to make the job safer and as comfortable as it can be.
Read More:Which lightweight cordless vacuum is the best?
These are the items you will be using to actually get the job done.
- check
- check
- check
How To Remove Hardwood Floor
Now I am going to show you the best way to get rid of your old hardwood floor. I will warn you this is not “easy” work, but it certainly is effective and will make sure that your floor is ready for whatever you decide to lay down next.
Step 1: You want to get the circular saw and start cutting the hardwood floorboards roughly in half or every foot if they are really long. Cutting them into smaller pieces makes it so much easier to lift them off after. Make sure you have the saw set to the right height so you do not cut what is underneath.
Our hardwood was right around 5/8 thick so that is what we set the saw too. If you are not sure, it is better you have it set a little higher. Even cutting them a little bit will make them easier to lift off. Just a heads up, there will be a ton of dust so make sure you keep your mouth closed and your glasses on.
Step 2: Now you can use your pry bar. With the pry bar, you just lift up all the boards, one at a time. If you are lucky, they will come up with very little resistance. Make sure you have a bucket close by as it is best to clean as you go.

Step 3: You may notice that there are some staples and nails stuck in the ground from where the hardwood floor was secured to the ground. Getting this out can be a bigger hassle than the hardwood floorboards themselves!
However as you made sure to prepare beforehand, you can use the nail claw or the curved vice grips to get them out. This can be really annoying, but stick with it, have some good music playing and you will be done before you know it.
Step 4: Once you have gotten all the hardwood floor up, you will notice that in between all the dust, wood and dirt are a bunch of metal staples and nails! Use the large magnet to pick them all up. It is much quicker doing this and you are making sure the vacuum cleaner is not going to get damaged as a result of nails and staples.
Read More: These cordless vacuums are ideal for cleaning hardwood floors
That is all there is to it, it can be time-consuming if you have a large area to do, but as long as you have the right tools, you will get through it as quickly and painlessly as possible. One thing I will say as a last bit of advice is to make sure you clean up thoroughly.
I know after you have spent a day removing hardwood floor, cleaning is the last thing you want to do. However, having a clean and clear floor for your new flooring to go on will make things a lot easier.
Resources
SawsReviewed.com PopularMechanics.com
 Makeit-loveit.com
Declutter your home once and for all (Even if you have no time and don't know where to begin)! Learn More.

