If you own the Shark Ion vacuum, there’s a chance you’ve encountered one or two common ‘hic-ups’ in its operation. But no need to worry, as most of these problems can be fixed pretty quickly using some easy troubleshooting tips.
In this article, you’ll find 13 must-know troubleshooting tips every Shark Ion Robot vacuum owner should know. Read on to learn how to fix almost any issue you may encounter and how to reset the Shark Ion Robot vacuum.


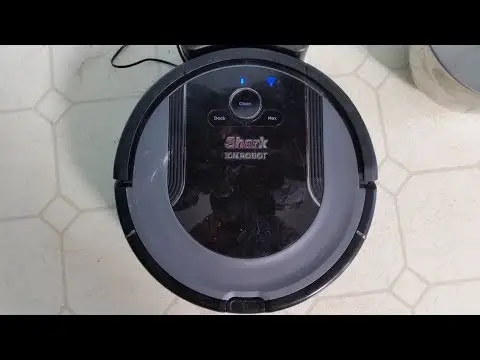
How To Fix a Shark Ion Robot Not Charging
Your Shark Ion cleaner not charging can be due to several reasons, including using a damaged charger, worn-out batteries, or a faulty power outlet. This can cause many inconveniences, especially when you need to dry vacuum your carpet or floor.
However, you can fix these problems pretty quickly by following the steps below.
Replace the Battery
The Shark Ion cleaner’s batteries are consumables, so they’ll need to be replaced periodically depending on use.
To replace your robot’s battery, follow these steps:
- Open up your robot’s backplate using a flat head screwdriver.
- Remove the used batteries and place new ones in their respective slots.
- Put the backplate back on, ensuring it’s well fastened so water can’t seep in.
Tip: If you need quality replacement batteries, I recommend this Shark Lithium-Ion Power Pack (link to Amazon). It’s rechargeable and delivers up to 30 minutes of constant power supply for uninterrupted cleaning.
Replace the Charger
If you have a damaged battery charger, your Shark Ion robot not charging problem might be solved by replacing it with a new one.
To replace your robot’s battery charger, follow these steps:
- Turn off the Shark Ion robot and unplug the cable from it.
- Tilt the battery compartment cover to one side so you can remove it.
- Take out the used battery charger and replace it with a new one of the same model, ensuring it’s plugged into a working power outlet.
- Put the backplate back on, ensuring it’s well fastened so water can’t seep in.
Check If the Power Outlet Is Working
The power outlet which you’re using might not be supplying enough power for both your vacuum and charger to work properly at the same time due to its wattage capacity or voltage.
In this case, you can use a power strip or surge protector to supply additional outlets. In addition, check if the outlet has blown a fuse.
To check whether the power outlet is working or not, follow these steps:
- Turn off your vacuum and unplug it from its charger.
- Plug in a different appliance such as a lamp into the power outlet to check if it works properly.
- If you don’t have any appliances at hand, use another circuit breaker on your electrical panel to plug the vacuum cleaner back in and see if it turns on when more wattage capacity and voltage available for the socket.
What To Do If Shark Ion Robot Is Not Connecting to Wi-Fi
Several things can cause your Shark Ion robot not to connect to Wi-Fi properly.
These include using the wrong password, your phone failing to connect to the internet, the robot not detecting your Wi-Fi network, turning on Mac Filtering, as well as your firewall and port settings.
")
Here are ways to fix these problems:
Verify You’ve Used the Correct Password
If you’re having trouble connecting your Shark Ion cleaner to your phone’s Wi-Fi network, there’s a possibility you’ve entered an incorrect password.
To check if you’ve used the correct password, follow these steps:
- Turn off your robot’s Wi-Fi by pressing and holding down its Home button until a pop-up shows.
- From the list of networks it detects, select your network and enter your password.
- Press ‘Connect’ at the bottom of the screen once the text boxes show up again with ‘connected.’
- Connect to your phone’s Wi-Fi network from there on out to see if this fixes the problem.
Restart Your Phone
Sometimes, simply restarting your phone can fix problems connecting to a wireless network because connections between devices become disrupted after switching off and back on again.
To restart your phone, perform the following steps:
- Hold down the power button on your phone to see your device options.
- Find ‘Restart’ or ‘Power Off’ among this list and select one by tapping it with your finger.
- Wait for a few seconds until your phone shuts down before powering it back on again.
- Try connecting to Wi-Fi now to see if that fixes the problem or not.
Reboot the Robot
Since the Shark Ion vacuum’s Wi-Fi connection is usually linked with its processor, performing a reboot can help fix any potential problems connected to its wireless network connectivity quite easily.
To reboot your robot, follow the steps below:
- Turn off and unplug your Shark Ion robot cleaner from its charger.
- Press and hold down its Home button until a pop-up shows asking you to scan for home networks.
- Select your Wi-Fi network and enter your password to connect to it before pressing ‘Connect’ at the bottom of the screen once again.
Check If Your Internet Connection Is Working Properly
If there’s any problem with your device’s internet connection, then it might not be able to detect other devices on its network like your phone or laptop computer properly, causing them to fail to connect as well.
To check if your internet connection is working correctly or not, open your device’s Wi-Fi setting page to see if it manages to detect any wireless networks or not.
If it detects a network but fails to connect you with the password screen even after entering the correct password, this is a good indication of a problem with your internet connection.
To fix this problem, please follow these steps:
- Reboot your router by turning it off and on again from its power source for roughly thirty seconds before trying to connect again.
- Should that fail, try restarting your computer as well as checking all of your cables and wires connected to the router to make sure they’re correctly plugged and connected securely without any loose ends.
- If you still can’t connect, it’s best to check if your internet service provider (ISP) is having any problems on their end that might be interfering with your connection.
- Check for firmware updates available on the manufacturer’s website meant to fix bugs and errors found in previous firmware versions.
Disable Mac Filtering
Sometimes, devices connected to a specific network experience connectivity issues due to Mac Filtering being turned on by default on routers or PCs made by some manufacturers like Apple, which assigns devices with static IP addresses whenever they reconnect to its wireless network after shutting down (source).
To check if Mac Filtering is enabled on your PC or router:
- Open the Start Menu and go to the Control Panel menu.
- Once there, click ‘Network and Internet’ followed by ‘Network Connections.’
- Right-click the wireless connection you use then left-click ‘Properties’ among all of the menu options displayed afterward.
- Look for an option called ‘Internet Protocol Version 4 (TCP/IPv4).
- Click on this button – a new window pops up with two checkboxes next to an ‘IP Address’ label.
- Uncheck the first box and then click on the ‘OK’ button at the bottom to save your changes, then close it out.
- Reconnect to your wireless network again by turning off and restarting your router from its power source.
Check the Firewall and Ports
Another common cause for devices not being able to connect wirelessly is due to firewall settings.
Specifically, the Windows Firewall installed on most computer operating systems can sometimes block your Shark Ion vacuum from connecting to your network if it’s using a specific port already occupied by another program running on your computer.
To check if this is your problem, follow these steps:
- Open the Start Menu and go to the Control Panel menu
- Click ‘Systems and Security’ followed by ‘Windows Firewall’
- Ensure both private and public networks are set to be allowed through the firewall and all programs can be used wirelessly
If the problem persists, refer to your router’s manual or contact its manufacturer for more information on configuring your firewall settings to allow certain programs through it.
5 Steps To Reset a Shark Ion Robot Vacuum
Shark Ion vacuum cleaners are some of the more popular robotic smart devices that work with an app on your smartphone to keep your floors clean.
While they’re pretty easy to use, there are still some issues that might arise during its regular operation, including not charging all the time despite sitting on top of its base station or even getting stuck somewhere due to an obstruction on the way.
Often, resetting the robot may help solve some of these problems.
To reset a Shark Ion Robot, follow these steps:
- Download the Shark Ion App and open up its main menu.
- Go to ‘Settings’ from this menu and
- Click on the tiny gear icon next to your device name.
- Select ‘Factory Reset’ among the list of options that pops up afterward.
- Confirm you want to use this feature by clicking on ‘Yes.’
- Turn off the vacuum cleaner for at least 10 seconds
- Turn the vacuum back ON again so it can reset all its settings accordingly using new firmware versions whenever they become available through an update on the Shark Ion website.
Alternatively, you can reset your Shark Ion robot by long-pressing the ON/OFF switch for 10 seconds, waiting for 10 seconds, and then turning it back on.
How To Fix a Shark Ion Robot Not Going Straight
The Shark Ion robot has a cleaning pattern to ensure it covers every part of your living room or home while avoiding any obstacles in its way at the same time. However, your Shark Ion robot may sometimes start going in circles instead of moving straight.
")
When it’s having an issue with turning to the right or left when you’re using it in your home, there are a few things that cause this problem, ranging from a jammed bumper to a dirty wheel.
Nonetheless, here are ways to fix your Shark Ion robot not going straight:
Clean the Bumper
The first potential cause for a Shark Ion robot not going straight is a jammed bumper.
Whenever this happens, your device will try to correct this issue by turning in a different direction, but the problem lies within the wheel underneath it, which starts spinning around without going anywhere.
To fix this, you’ll need to clean out any debris lodged there, like dust or pet fur, which will allow the wheel underneath to spin correctly again.
Clear the Wheel of Debris
Another problem that can cause your Shark Ion vacuum cleaner not to go straight is a dirty wheel.
This happens if it hasn’t been able to detect any obstacles in its path for quite some time, which leads to it going in a different direction until something gets in the way.
To fix this issue, you’ll need to clean out any debris or pet fur on its wheel first before turning it back on again.
Clean the Cliff Sensors
One of the most common possible causes of your Shark Ion robot not going straight is dirty cliff sensors.
These sensors are usually located underneath the device’s bumper and work with infrared beams to keep your Shark Ion vacuum cleaner from falling down the stairs or onto ledges in your home when it detects they’re there.
To clean them, you’ll need to use a cotton swab with some rubbing alcohol on it to wipe them over gently without damaging them in the process.
Here’s a video to gain some insights into how to clean and maintain your Shark Ion vacuum cleaner:
Update Your Shark Ion Robot’s Software
Finally, you might also need to update the firmware on your Shark Ion robot if it’s having issues with not going straight.
This happens because its software is usually updated through an app on your smartphone whenever a new version becomes available, which means you’ll have to update this first before trying any of these other methods.
To do this, you’ll need to download the Shark Ion app on your smartphone and open it up before signing in with your email or Facebook account.
Once you do this, go to the settings menu and find ‘App Version.’ to look for any updates available at this point, or simply click on ‘Check Now’ if there’s nothing there yet.
After updating the app itself, try turning your Shark Ion robot back on again so it can use the new software to deliver a better experience for you.
Recommended Reading:
How To Clean Shark Rocket Vacuum Filter
Shark IONFlex 2x Duoclean IF251 Cordless Vacuum Cleaner Review
Declutter your home once and for all (Even if you have no time and don't know where to begin)! Learn More.
